


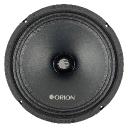
A meaningful car audio upgrade changes how music feels inside the vehicle. Vocals become easier to understand, instruments sound more distinct, bass gains definition, and the system maintains better control as the volume rises. These improvements come from selecting compatible components and configuring them to work together rather than simply choosing equipment with the highest advertised wattage.
Many drivers begin upgrading their systems by replacing the factory speakers. That can be a sensible first step, especially when the original speakers sound dull or struggle at higher volume. However, the speakers may not be the only limitation. A factory head unit might restrict output, the amplifier may lack sufficient clean power, or poor installation conditions may prevent the new speakers from performing effectively.
A smarter approach starts with the listening experience you want to achieve. Some drivers need greater volume for highway listening, while others prioritize detailed vocals, stronger mid-bass, or a more immersive soundstage. Your priorities should determine which components deserve attention first.
An orion car audio upgrade can be approached as a complete system-planning exercise. By understanding the relationship between source quality, speakers, amplifiers, subwoofers, wiring, and tuning, you can make practical improvements without replacing equipment that still meets your needs.
Before purchasing new components, identify what is already installed and how well it performs. This step helps separate genuine equipment limitations from problems that can be resolved through setup adjustments or installation improvements.
Start by listening to several familiar recordings at different volumes. Choose music with clear vocals, strong percussion, sustained bass notes, and a wide range of instruments. Listen for the specific moments when the sound becomes unpleasant or loses detail.
For example, if the system sounds balanced at low volume but becomes harsh when turned up, the issue could involve clipping, speaker limitations, or excessive equalization. If vocals are clear but the bass feels weak, adding a suitable subwoofer may be more effective than replacing every speaker.
Use these observations to identify the most likely upgrade priorities:
Limited loudness: Evaluate speaker sensitivity, amplifier output, and the maximum clean signal level.
Unclear vocals: Check speaker condition, midrange response, installation, and equalizer settings.
Weak musical impact: Assess mid-bass reproduction, door mounting, and subwoofer integration.
Excessive distortion: Investigate source clipping, amplifier gain, damaged components, and overloaded speakers.
Unbalanced soundstage: Review channel levels, speaker placement, polarity, and time alignment.
Inconsistent bass: Examine subwoofer placement, enclosure design, crossover settings, and cabin acoustics.
Avoid changing multiple components before identifying the main weakness. A targeted upgrade is often easier to install, tune, and evaluate than a complete system replacement without a clear plan.
Not every driver needs the same combination of speakers, amplification, and bass equipment. A practical system should reflect your listening habits, available installation space, and budget.
If your goal is better sound during commuting, begin with the speakers and source equipment. A well-matched replacement speaker may improve clarity and tonal balance without requiring major changes to the vehicle.
Check whether the factory radio supplies sufficient clean power for the selected speakers. Many replacement speakers can operate from a factory head unit, but their potential output depends on sensitivity, impedance, and the power available from the source.
For this type of upgrade, prioritize suitable fitment, clear midrange reproduction, reliable construction, and reasonable sensitivity. A properly installed speaker that works well with the existing system can be more satisfying than a demanding model that requires additional equipment you did not plan to purchase.
Drivers who want higher listening levels may benefit from an aftermarket amplifier paired with compatible speakers. An amplifier can provide additional clean power and headroom, helping the system maintain control when musical passages become more demanding.
However, more amplifier power does not automatically mean better sound. The source signal must remain clean, gain must be set correctly, and the speakers must operate within their intended limits.
Plan the amplifier and speakers together. Compare their supported impedance, continuous power handling, and intended application before deciding how the system should be connected.
A more advanced setup may combine front component speakers, a dedicated amplifier, a subwoofer, and a signal processor. This arrangement provides greater flexibility over speaker placement, frequency distribution, and tonal balance.
The extra flexibility also introduces more decisions. Crossovers, phase, time alignment, gain structure, and electrical requirements become increasingly important as the system grows.
Build the system in stages when necessary. Each upgrade should address an identifiable need and work with the components already installed.
Speakers have a direct influence on how vocals, instruments, and musical detail are reproduced. Choosing the right design involves more than matching the diameter of the factory speaker.
Coaxial speakers combine the main driver and high-frequency driver in one assembly. They can be convenient for straightforward replacements and often suit installations where the original mounting locations are the most practical option.
Component speakers separate the woofer and tweeter, usually with a crossover network. This can provide additional flexibility when positioning the tweeters to improve the perceived soundstage. Their advantages depend on proper installation, crossover configuration, and the acoustics of the vehicle.
When comparing speakers, pay attention to these factors:
Sensitivity: Higher sensitivity can allow a speaker to produce more output from the same power under comparable measurement conditions. Check how the rating was measured before comparing different models.
Continuous power handling: This provides a more useful indication of sustained power capability than peak power claims alone. Match it with an appropriate amplifier and clean signal.
Impedance: The speaker load must be compatible with the amplifier or head unit. Incorrect wiring can create an unsupported load and cause overheating or protection shutdowns.
Frequency response: Look beyond the advertised frequency range. The consistency of the response and the speaker's behavior at higher output also affect sound quality.
Physical fitment: Mounting depth, adapter requirements, grille clearance, and window-mechanism clearance all matter.
For a balanced upgrade, select speakers based on their real installation requirements and expected performance. Avoid assuming that a larger driver or a higher wattage figure automatically guarantees greater clarity.
An amplifier can make a significant difference when the existing source cannot deliver enough clean power for the intended listening level. It provides the electrical drive required by the speakers while giving the system more headroom when configured appropriately.
One important distinction is the difference between amplifier gain and volume. Gain adjusts how the amplifier responds to the incoming signal. Turning it up excessively does not create unlimited clean power; it can cause the amplifier to reach clipping earlier.
Clipping occurs when an amplifier cannot reproduce the requested waveform accurately. The resulting distortion can reduce sound quality and increase the risk of speaker damage. A high-quality amplifier operated beyond its limits can still produce poor results.
A sensible amplifier selection process includes:
Identify the impedance of each speaker and the total load connected to each channel.
Compare the amplifier's continuous output at the relevant impedance.
Confirm that the source can provide an appropriate input signal.
Check the amplifier's supported wiring configurations and cooling requirements.
Set gain using an appropriate procedure rather than by ear alone.
Verify that the speakers remain clean at the intended listening level.
The goal is adequate clean output with a reasonable safety margin. An amplifier that is correctly matched and configured can deliver a more controlled listening experience than a larger unit that is poorly installed or improperly adjusted.
High-power audio equipment draws meaningful current from the vehicle's electrical system. As amplifiers become more powerful, installation quality and electrical planning become increasingly important.
An amplifier needs suitable power and ground connections, wiring sized for the expected current, and protection appropriate to the installation. A poor ground connection or undersized power cable can contribute to voltage drop, unstable operation, or excessive heating.
Before installing an amplifier, consider the following:
Use power cable with an appropriate current capacity for the amplifier and cable length.
Install the required fuse close to the battery on the power cable, following the equipment and wiring requirements.
Ensure the ground connection is secure and uses a suitable grounding point.
Protect wiring from sharp edges, moving components, heat, and moisture.
Route cables carefully to reduce the likelihood of interference and physical damage.
Check the battery and charging system if the vehicle shows signs of electrical strain.
A battery upgrade or additional electrical component should not be the automatic first response to every voltage problem. Diagnose the vehicle's charging capacity and actual current demand before making changes.
Good electrical planning protects the equipment and helps the system perform more consistently when music becomes demanding.
Bass contributes weight, rhythm, and impact, but a strong low-frequency response should support the music rather than dominate it. Increasing the bass level indiscriminately can make vocals less intelligible and cause the overall presentation to sound muddy.
A dedicated subwoofer is often the most effective way to add deeper bass when door speakers cannot reproduce the lowest frequencies at the desired volume. The subwoofer should be selected according to available space, enclosure requirements, amplifier capability, and the kind of music you enjoy.
Sealed enclosures can offer controlled response when designed correctly. Ported enclosures can provide greater output around their tuning region, but their performance depends on the driver, box dimensions, and port design.
Neither enclosure type is automatically best for every vehicle. The right choice depends on the required response, available space, and the subwoofer's specifications.
The subwoofer's crossover settings should complement the capabilities of the front speakers. If the crossover is too high, the bass may seem disconnected from the rest of the music. If the settings leave a gap between the speakers and subwoofer, the system may sound thin around the transition region.
Polarity, phase, placement, and relative volume also affect how the low frequencies combine at the listening position. Make small adjustments and evaluate the result from the driver's seat.
If the system lacks bass because of incorrect polarity, poor enclosure construction, or a crossover mismatch, adding more bass boost may make the problem worse.
Diagnose the underlying issue first. A properly integrated subwoofer can create stronger musical impact without requiring excessive equalization or pushing the speakers beyond their intended limits.
Even carefully selected components may disappoint when they are mounted poorly. Automotive interiors contain flexible panels, resonant surfaces, wiring, and mechanical components that can affect speaker performance.
Door speakers need a secure mounting surface and appropriate sealing. If air escapes around the mounting interface or the door panel vibrates against nearby components, the result may include reduced mid-bass, rattles, and unwanted resonance.
Sound-deadening materials can help control certain panel vibrations when used correctly. They should be installed with care to preserve drainage paths, moisture barriers, wiring access, window movement, and vehicle safety systems.
A professional installation can be particularly useful when the upgrade requires custom brackets, component tweeter placement, amplifier mounting, or extensive door work. An installer can also identify fitment issues before they damage equipment or interfere with the vehicle's functions.
Do not overlook the smaller details: secure fasteners, correct polarity, properly routed cables, and clean connections contribute to consistent results. An expensive speaker installed in a poor mounting location may perform less effectively than a more modest model installed correctly.
A powerful system is not necessarily an immersive one. The perceived location of voices and instruments depends on channel balance, speaker positioning, timing, and the acoustic characteristics of the cabin.
Because the driver sits closer to one side of the vehicle, sound from the nearer speaker may arrive earlier and appear louder. Some head units and digital signal processors provide time-alignment controls that can help compensate for these differences.
Start with balanced channel levels and a sensible front-to-rear relationship. The front speakers generally establish the main presentation, while rear speakers can add ambience without pulling the entire soundstage behind the listener.
Use familiar recordings with clearly centered vocals to assess the result. If the voice appears heavily shifted toward one side, review channel balance and time alignment if available. If the rear speakers dominate, lower their contribution and listen again.
Equalization can then be used for modest refinements. Large boosts can reduce available headroom, so it is often preferable to reduce an excessive frequency region rather than dramatically boost a weak one.
A successful setup should sound coherent across different recordings. Vocals should remain intelligible, percussion should retain its definition, and the bass should connect naturally with the main speakers.
A budget works best when it is tied to specific goals. Replacing all the equipment at once can be unnecessary if one or two changes would resolve the main weaknesses.
Consider a staged approach.
Stage one: Improve the weakest speakers. Replace worn or underperforming factory speakers with suitable models. Confirm fitment, sensitivity, and compatibility with the existing source.
Stage two: Add clean power if needed. If the speakers sound good at moderate volume but lack headroom, evaluate whether an amplifier is the next logical improvement.
Stage three: Address low-frequency limitations. Add a properly matched subwoofer and enclosure if deeper bass is a priority. Integrate it carefully with the front speakers.
Stage four: Refine installation and tuning. Improve mounting, control unwanted vibration, set crossovers, and adjust channel levels. These changes can reveal the benefits of the equipment already installed.
Stage five: Consider advanced processing. If the system still needs better time alignment, signal management, or tonal refinement, evaluate a suitable processor or head unit with the necessary controls.
This sequence is a planning framework, not a rule that every system must follow. Your current equipment and listening goals may make another order more appropriate. The important point is to invest in the areas that address measurable or audible weaknesses.
Several avoidable decisions can prevent a system from delivering its expected performance.
Buying equipment based only on peak wattage: Peak figures do not reliably indicate clean output or overall sound quality. Compare continuous power ratings, sensitivity, impedance, and intended use.
Ignoring the factory system's limitations: Some factory audio systems use equalization or bass reduction that changes with volume. Understand the signal before choosing new amplification or processing.
Using excessive equalization: Large boosts can increase distortion and reduce available headroom. Adjust the underlying setup before applying aggressive processing.
Choosing speakers without measuring: Matching the nominal speaker size is not enough. Verify mounting depth, brackets, connectors, and clearance behind the panel.
Treating gain as a volume control: Excessive gain can introduce clipping and increase the risk of damage. Configure the amplifier and source as a coordinated signal chain.
Ignoring the electrical system: Insufficient wiring capacity, poor grounds, and unsuitable fusing can create reliability and safety problems.
Failing to test after installation: A system should be evaluated for distortion, rattles, channel balance, and crossover integration before it is considered complete.
Avoiding these mistakes can save money and reduce the need to troubleshoot problems after the upgrade.
Once the equipment is installed, use a consistent listening routine rather than judging the system from one loud song.
Begin with a recording you know well. Listen at a moderate volume and check vocal clarity, instrument separation, and tonal balance. Keep enhancement settings conservative until the basic system sounds clean.
Next, test a track with strong bass transients. The kick drum should remain defined, and the subwoofer should support the music without overwhelming the front stage. If the bass sounds disconnected, revisit crossover settings, polarity, phase, and subwoofer level.
Then raise the volume gradually. Listen for harshness, compression, crackling, or mechanical rattles. If the sound becomes unpleasant, reduce the level and identify the cause instead of continuing to push the equipment.
Try several genres before making final adjustments. A system tuned exclusively for one recording may sound excessive or dull with other music. The best everyday configuration should remain enjoyable across your normal listening habits.
Finally, assess the result from the driver's seat. Vehicle acoustics can change the perceived balance significantly, so the system should be tuned for its actual listening position rather than for how it sounds beside the speakers or amplifier.
Building a better car audio system is a process of balancing equipment capability, installation quality, and careful adjustment. Speakers establish much of the system's character, amplifiers provide clean power, subwoofers extend low-frequency performance, and tuning helps all the components work together.
An orion car audio setup should be selected according to the vehicle, listening priorities, and equipment compatibility rather than a single specification or advertising claim. Think about the improvements that matter most, whether that means clearer vocals, greater usable volume, more controlled bass, or a more stable soundstage.
Begin with a clear assessment of your current system, choose components that meet your requirements, and install them with attention to fitment, wiring, and acoustic performance. Add new equipment only when it solves a real limitation, and leave enough time to configure the finished system properly.
The most satisfying result is not simply a louder cabin. It is a system that brings music to life with cleaner detail, balanced energy, and dependable performance throughout everyday driving.